
System Requirements & Installation
This guide covers what your site needs to run ForeBranch and how to install the free plugin.
System requirements
| Requirement | ForeBranch (free) | ForeBranch Pro add-on |
|---|---|---|
| WordPress | 5.9 or later (tested up to 7.1) | Tested up to 7.1; the free ForeBranch plugin must also be installed and active |
| PHP | 8.2 or later | 8.2 or later |
| Themes | Block themes (Full Site Editing) and classic themes | |
For large GEDCOM files, your server’s memory, time limit, and upload size matter too. The Diagnostics tab recommends:
- 256 MB or more of memory for files over 5 MB
- 300 seconds (5 minutes) or more of execution time
- An upload limit of 16 MB or more
See Server Settings for Large Imports if your server falls short.
Multisite
ForeBranch is not specifically tested as a network plugin. Each site uses its own database tables, so activate it on the individual site where you want the tree.
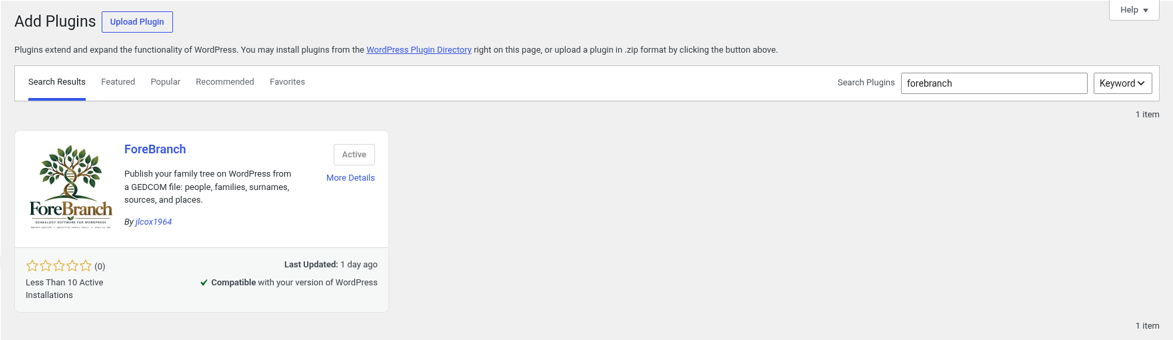
Install ForeBranch from WordPress
- In your WordPress admin, go to Plugins → Add New.
- Search for ForeBranch.
- Click Install Now, then Activate.
You can also download the plugin from wordpress.org/plugins/forebranch and upload it with Plugins → Add New → Upload Plugin, or copy the plugin folder to /wp-content/plugins/forebranch/ and activate it on the Plugins screen.
After activation
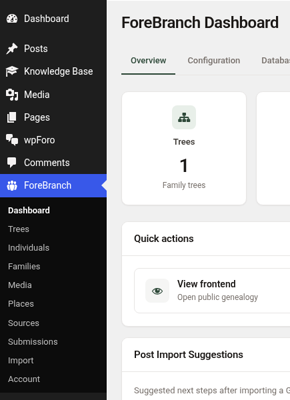
A new ForeBranch menu appears in your WordPress admin sidebar. With ForeBranch Pro active, it contains these items (the Media and Submissions tools are Pro features):
- Dashboard
- Trees
- Individuals
- Families
- Media
- Places
- Sources
- Submissions
- Import
- Account
Your first steps
- Go to ForeBranch → Dashboard → Diagnostics and check the status tiles for PHP, memory, time, and upload size.
- Go to ForeBranch → Trees → Add and create your first family tree.
- Go to ForeBranch → Import and import your GEDCOM file.
- Review your privacy settings under ForeBranch → Dashboard → Configuration.
- Visit /genealogy/ on your site to see the result.
The next article, Importing Your First GEDCOM, walks through steps 2 and 3 in detail.
Deactivating or deleting the plugin
- Deactivating ForeBranch does not delete your tree.
- Deleting the plugin always removes its settings. Your genealogy tables and imported GEDCOM work files are kept unless you checked Delete all data when plugin is uninstalled under ForeBranch → Dashboard → Configuration before deleting. That choice cannot be undone.
Privacy
The free ForeBranch plugin stores the genealogy data you import in your own WordPress database and does not send personal or genealogical data to any external service. Some Pro features, such as geocoding and AI biographies, contact outside services only when you use them. See Common Questions for details.